My homemade maple syrup evaporator is complete. Using a 55-gallon drum, 2 steam table pans (the kind you’d see at buffet line) and some simple smokestack tubing, I built an inexpensive evaporator, also called an “arch,” that will hopefully serve me well this season.
I can not claim credit for devising this ingenious design. Countless others have come before me with the same idea, including my next door neighbor, Fred. But this is one of the beautiful traits of maple sugaring: you can bring your own creativity and add your own touches to the tried-and-true methods that have come before.
Here is how I built my evaporator.
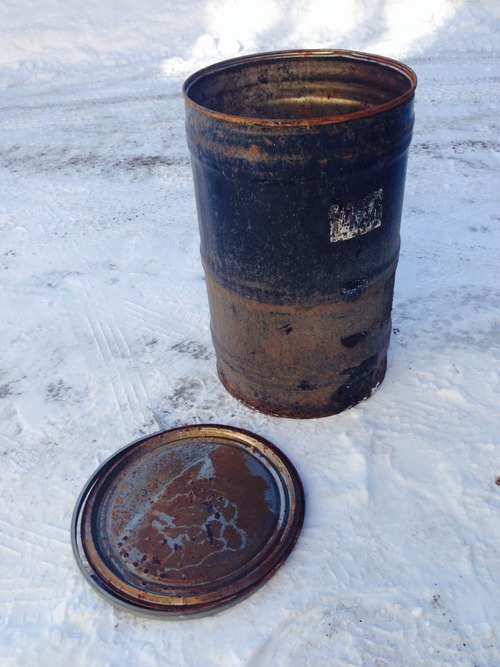
A before photo of the steel drum, about to be transformed to an evaporator.
I first cut a door on the front of my steel drum, which will act as the wood-feeding port and air supply. It is 12″ x 12″ square, and I made sure to cut the hole near the bottom of the barrel for two reasons: 1.) to leave room for the 6″ deep evaporator pans which will be sunken into the top of the barrel and 2.) to keep the smoke contained in the barrel and moving toward the chimney in the back. I used an angle grinder to start my cuts and then cut my straight lines through the steel with a metal-cutting blade on a sawzall.
Next up was the chimney. I purchased common galvanized steel chimney parts at my local hardware store for a total of about $20. I measured a hole that would fit the chimney exit and used self-tapping screws to secure it. At first, I decided to use 24″ of stove pipe. But I quickly learned that higher chimneys produce a better draw, or draft, so I upped the height to a full 48″.
Before cutting holes for my evaporator pans, I fired a test run to cure the barrel. Mainly, I wanted to burn off the black paint that was coating the outside of the barrel — I didn’t want the paint flaking off and contaminating my syrup on my first batch.
Once cured, I measured two holes to fit the two full-size steam table pans that I purchased off of Amazon. I failed to take into account the tapered sides of the pan, so my first hole was left with gaps near the bottom. I learned my lesson and the second hole slowly tapers as it nears the bottom, creating a tight seal against the pan.

A close-up of the holes cut to fit the evaporator pans. Notice the gaps around the pan on the right, where I failed to take into account the tapered sides of the pan and cut too-large a hole. I learned my lesson by the time I cut the second hole.

A side-view of the completed evaporator.
I took video during the whole process, which I’ll embed below.
If you’re reading this and you are a hobby sugarer with a homemade evaporator, I would certainly appreciate your insight or comments about my build. I’d love to hear about your own homemade evaporator, too — leave a comment below.
Happy sugaring.

2 thoughts on “Homemade Maple Syrup Evaporator Build – with video”